
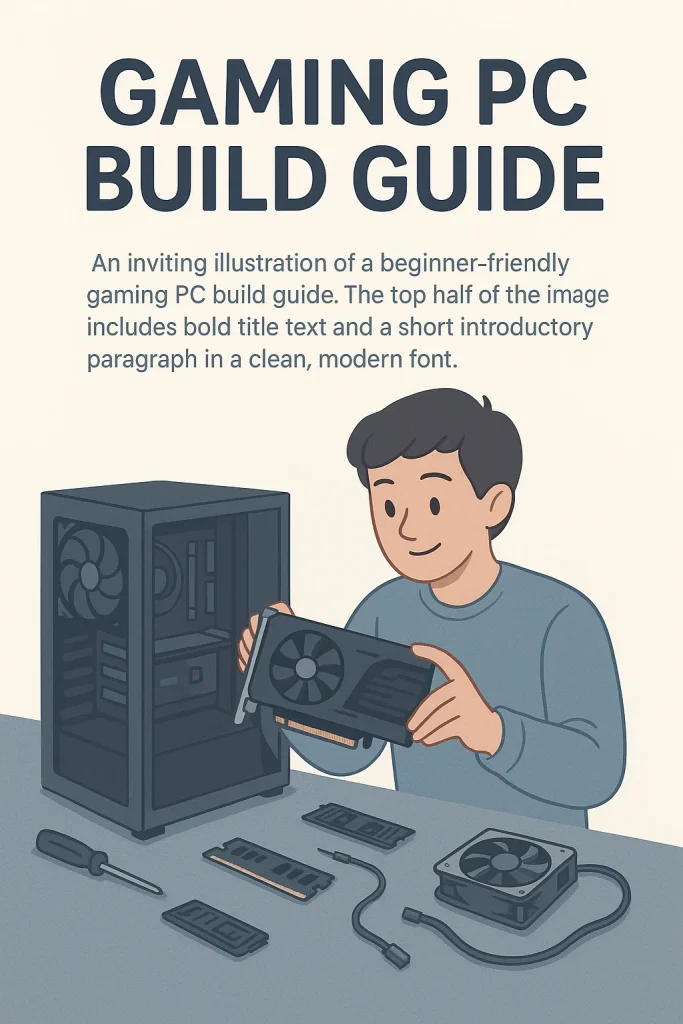
I know it seems a little bit difficult when you’re building a PC for the first time, it seems like you’re trying to solve a puzzle with all the different pieces. Especially if you’re not from an IT background, then it seems impossible. But now you don’t have to be worried! This guide is here to help you understand how to build a gaming PC with step-by-step instructions.
We’ll take it slow and walk through every step, choosing your parts, connecting the pieces, and turning it on for the first time. You don’t need to be a tech expert to build your own gaming PC. Think of it like building a very cool LEGO set. By the end of this guide, you’ll have the confidence to build your own PC by yourself, and then you can enjoy playing all the games you have been dreaming of. Let’s get started!
What You Need Before Starting
Before you start putting parts together, there are a few important things you need to know. This will make the whole building process much smoother.
Basic Things You Should Know
You don’t need to be a tech expert, but it will help you to know a few basic things. You’ll be working with small parts, so having a clean space is important. Also, you’ll need some basic tools, like a screwdriver. That’s about it!
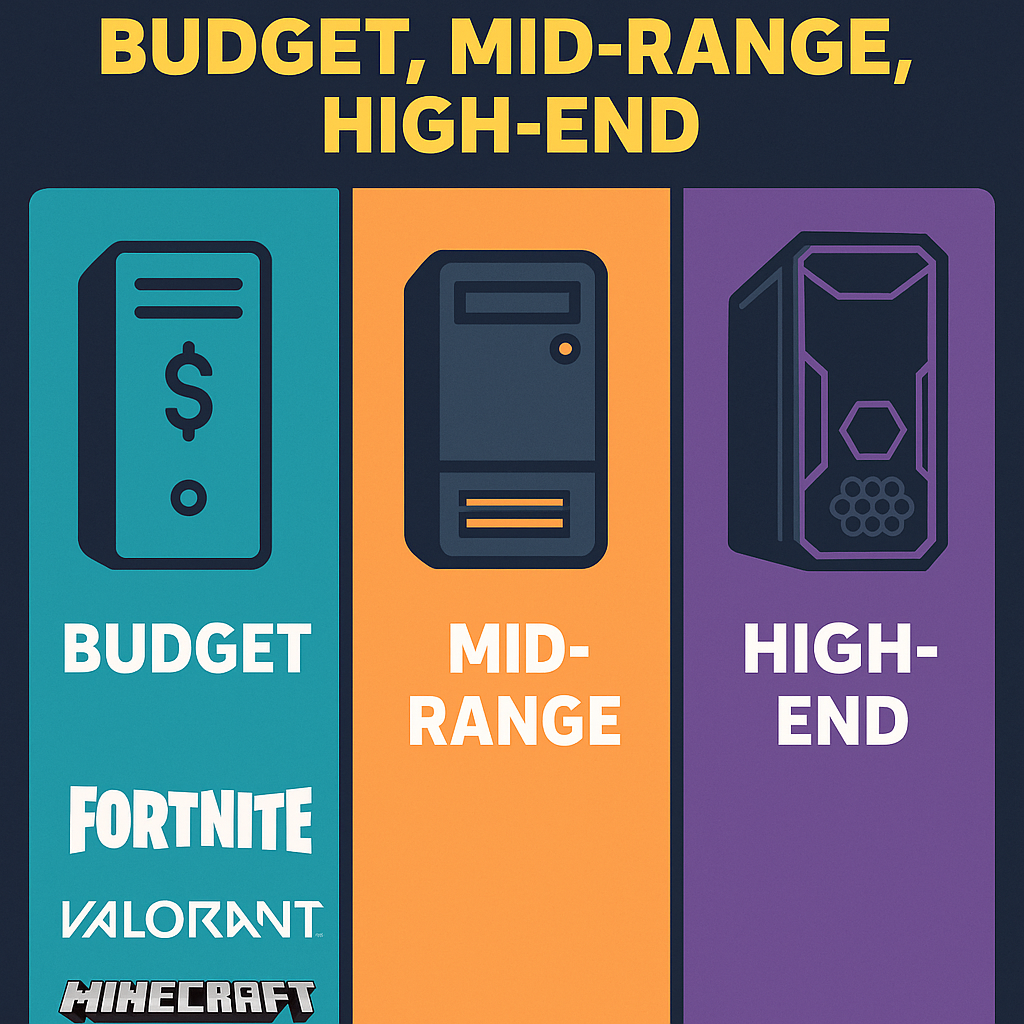
Budget Decision: Budget, Mid-Range, High-End
One of the first and most important decisions you’ll make is about your budget. How much money are you willing to spend? This will help you choose the parts you can buy and the kind of gaming experience you’ll get.
- Budget Gaming PC: These are great for playing popular online games like Fortnite, Valorant, or Minecraft at good settings. You’ll save money but might not be able to play the newest, heaviest games on the highest settings.
- Mid-Range Gaming PC: This is often the sweet spot for many gamers. You can play most new games at good to high settings and get a smooth experience without spending too much money.
- High-End Gaming PC: If you want the best graphics, super smooth gameplay, and have a heavy budget, then a high-end PC is the right choice. It can run any game on the highest settings and will stay powerful for many years.
Importance of Knowing Your Goals
Knowing what you want to do with your PC is key.
- Are you mostly playing older games or light games? A budget gaming PC might be perfect.
- Do you want to play all the latest and greatest games with the best graphics? A mid-range gaming PC is likely a perfect choice.
- Are you a serious gamer who wants to stream, play in virtual reality, and have no compromises on graphics? Then a high-end gaming PC is what you’re looking for.
Understanding your goals will help you choose the right gaming PC components.
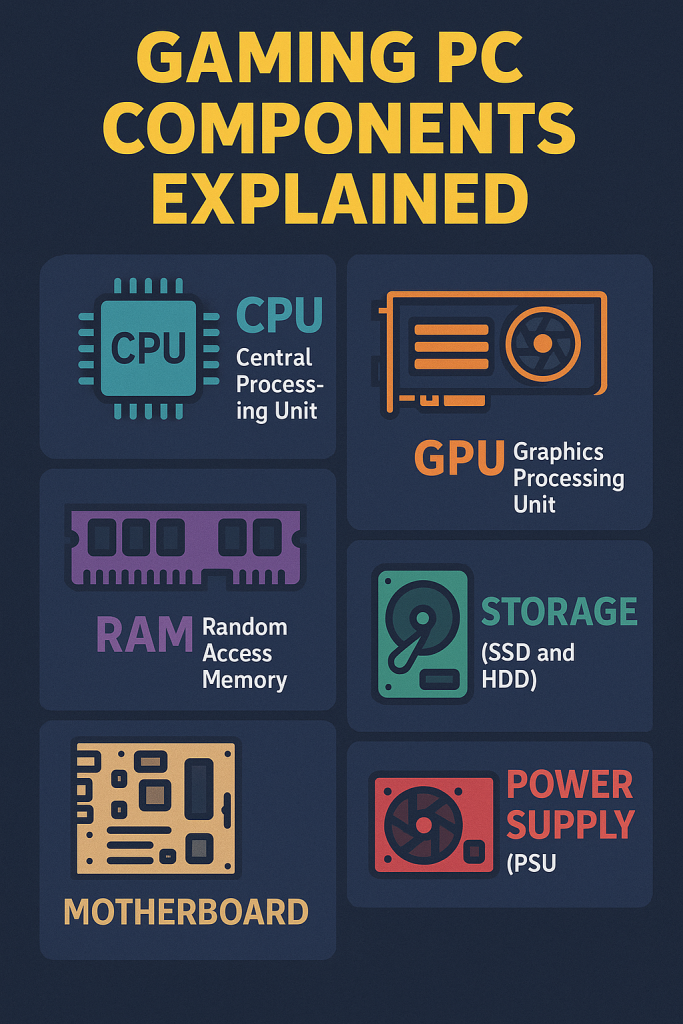
Gaming PC Components Explained
Let’s explain the main parts of a gaming PC simply, so you understand what each one does. You can think of these parts like the body parts of your computer.
- CPU (Central Processing Unit): This is often called the “brain” of your PC. The CPU does all the thinking and calculations. A powerful CPU helps your games run smoothly and quickly, especially in complex game worlds.
- GPU (Graphics Processing Unit): This is the “artist” of your PC. The GPU is responsible for creating all the images you see on your screen and making them look good and move smoothly. For gaming, the GPU plays the most important part!
- RAM (Random Access Memory): Think of RAM like your computer’s short-term memory. It’s a place where your PC keeps things it is using right now. More RAM means your PC can handle more tasks at once, like running a game, having a browser open, and chatting with friends all without slowing down.
- Storage (SSD and HDD): This is where all your games, programs, and files live permanently.
- SSD (Solid State Drive): This is like a super-fast digital cabinet. Games and apps saved on it open much faster. Most modern gaming PCs use an SSD for Windows and your favorite games.
- HDD (Hard Disk Drive): An HDD is an old-style storage device that uses spinning disks to save your files, games, and apps. It’s slower than an SSD but much cheaper for storing lots of files. People often use an SSD for important games and programs and an HDD for less-played games or general files.
- Motherboard: This is like the “body” or “nervous system” of your PC. All the parts connect to it so they can work together and share information. Motherboard is the main part that brings everything together.
- Power Supply (PSU): This is like the “heart” of your PC. The power supply gives energy to all the other parts. You need one that’s strong enough to power everything you’ve installed.
- Case: This is the “shell” or “home” for all your parts. It holds everything together and protects it. Cases come in all shapes, sizes, and styles.
- Cooling: Cooling helps keep your PC from getting too hot, especially when you play games. Parts like fans or water coolers are used to cool it down. This stops the PC from overheating and keeps it working properly.
Step-by-Step PC Build Tutorial
Now for the fun part: putting it all together. Remember to take your time and follow these steps carefully.
- Unpack All Parts: Unbox everything carefully. Put all of your parts on a clean table. Having boxes sitting beside you is helpful in case you need to refer back to instruction manuals.
- Set Up the Case: Place your PC case on its side, typically with the open side facing upwards. Take off the side panels. This will provide you with an easy way of accessing the inside.
- Install CPU:
- Open the CPU socket on the motherboard. There’s usually a small lever you push down and then to the side.
- Carefully line up the triangle or arrow on your CPU with the matching mark on the CPU socket.
- Gently place the CPU into the socket. It should drop in easily without force.
- Close the lever to secure the CPU in place.
- If your CPU comes with a separate cooler, you’ll install that now. Follow the cooler’s instructions carefully for applying thermal paste (which helps transfer heat away from the CPU) and securing the cooler.
- Add RAM:
- Find the RAM slots on your motherboard. They are usually long slots next to the CPU.
- Push down the small clips on each end of the RAM slot.
- Line up the notch on the RAM stick with the notch in the slot.
- Push the RAM stick firmly into the slot until the clips on both sides snap back into place, securing the RAM. You might hear a click.
- Attach Storage (SSD/HDD):
- Find the storage bays in your PC case. These are usually metal cages or dedicated spots.
- For an SSD, you might need to screw it into a small bracket first, then slide the bracket into a slot.
- For an HDD, you usually slide it into a bay and then screw it in to secure it.
- Connect the power cable from your power supply to the SSD/HDD.
- Connect the SATA data cable from the SSD/HDD to a SATA port on your motherboard.
- Install GPU:
- Locate the longest PCIe slot on your motherboard. This is where your graphics card goes. It’s usually the top-most long slot.
- Remove the metal covers on the back of your PC case that line up with this slot.
- Line up your GPU with the slot and push it down firmly until it clicks into place. There’s usually a small latch at the end of the slot that will lock it.
- Secure the GPU to the case with screws at the back.
- Plug in Power Supply:
- Mount the power supply unit (PSU) into its dedicated spot in the case (usually at the bottom or top back). Screw it into place from the outside of the case.
- Connect the large 24-pin power cable from the PSU to the main power port on your motherboard.
- Connect the 4-pin or 8-pin CPU power cable from the PSU to the CPU power port on your motherboard (usually near the top left of the CPU).
- Connect the PCIe power cables from the PSU to your GPU (your GPU might need one or two of these, depending on its power requirements).
- Connect Everything Else:
- Connect the small cables from your case (like power button, reset button, USB ports, and audio jacks) to the correct pins on your motherboard. Refer to your motherboard manual for where each one goes – this can be tricky, so take your time!
- If you have extra fans, connect their power cables to fan headers on your motherboard.
- Boot It Up for the First Time:
- Before closing the case, connect your monitor, keyboard, and mouse.
- Plug in the power cable to the PC and then to the wall outlet.
- Press the power button on your case.
- If everything lights up and you see something on your monitor (like the motherboard logo or a message about installing an operating system), congratulations! You’ve successfully built your PC.
- Now you’ll need to install an operating system like Windows.
Gaming PC Build Guide 2025 – Best Value Picks
Here are some general ideas for what kind of parts you might look for in 2025, keeping in mind that prices and new parts constantly change. These are just examples to give you an idea!
| Category | CPU (Best CPU for Gaming 2025) | GPU (Best GPU for Gaming 2025) | RAM | Storage (SSD) | Why it’s good |
| Budget Build | Intel Core i3 (latest generation) or AMD Ryzen 3 (latest generation) | NVIDIA GeForce RTX 3050 or AMD Radeon RX 6600 | 16GB | 500GB SSD | Great for 1080p gaming (standard HD) on medium settings. Plays popular online games very well. A good entry point for budget gaming PC enthusiasts. |
| Mid-Range Build | Intel Core i5 (latest generation) or AMD Ryzen 5 (latest generation) (e.g., Ryzen 5 7600X) | NVIDIA GeForce RTX 4060 Ti or AMD Radeon RX 7700 XT | 16GB-32GB | 1TB SSD | This is the sweet spot for 1080p to 1440p (higher resolution) gaming on high settings. Handles most new games with ease and provides a smooth experience. Excellent for a mid range gaming PC. |
| High-End Build | Intel Core i7/i9 (latest generation) or AMD Ryzen 7/9 (latest generation) (e.g., Ryzen 7 7800X3D) | NVIDIA GeForce RTX 4080 Super / RTX 4090 or AMD Radeon RX 7900 XTX | 32GB+ | 2TB+ SSD | For the ultimate 4K gaming experience with maximum settings and high frame rates. Perfect for enthusiasts who want no compromises and excellent PC gaming performance optimization. This is the peak of high end gaming PC builds. |
Helpful Tips for Beginners
Even with a step-by-step guide, building your first PC can feel like a lot. Here are some extra tips to make it easier:
- Use a Large, Clean Table to Work On: You’ll need plenty of space to lay out your parts and work comfortably. A clean surface also helps prevent static electricity and losing tiny screws.
- Watch a YouTube Tutorial: Seeing someone else build a PC can be incredibly helpful. Search for “pc building guide for beginners” or “step by step pc build tutorial” for a visual aid.
- Take Your Time: Don’t rush! It’s not a race. If you feel frustrated, take a break and come back to it. Rushing can lead to mistakes.
- Don’t Use Too Much Force: Most parts should slide or click into place relatively easily. If something isn’t fitting, double-check your alignment and the instructions. Forcing parts can damage them.
- Look at the Motherboard Book/Manual: Your motherboard comes with a detailed manual. This book shows where every tiny connection goes, which is super important for connecting the small case wires. Keep it handy!
Gaming PC Peripherals You’ll Need
Once your PC is built, you’ll need a few extra items to actually use it for gaming! These are called gaming PC peripherals.
- Monitor: This is your screen! For gaming, look for a monitor with a fast “refresh rate” (like 144Hz or higher) for smoother visuals and a low “response time” (1ms is great) to avoid blur.
- Keyboard: You’ll need a keyboard to type and control your games. Many gamers prefer mechanical keyboards for their feel and responsiveness.
- Mouse: A good gaming mouse is essential. Look for one that fits your hand comfortably, has extra buttons you can program, and a high “DPI” for precise movements.
- Headset: A headset with a microphone lets you hear game sounds clearly and talk to your teammates online.
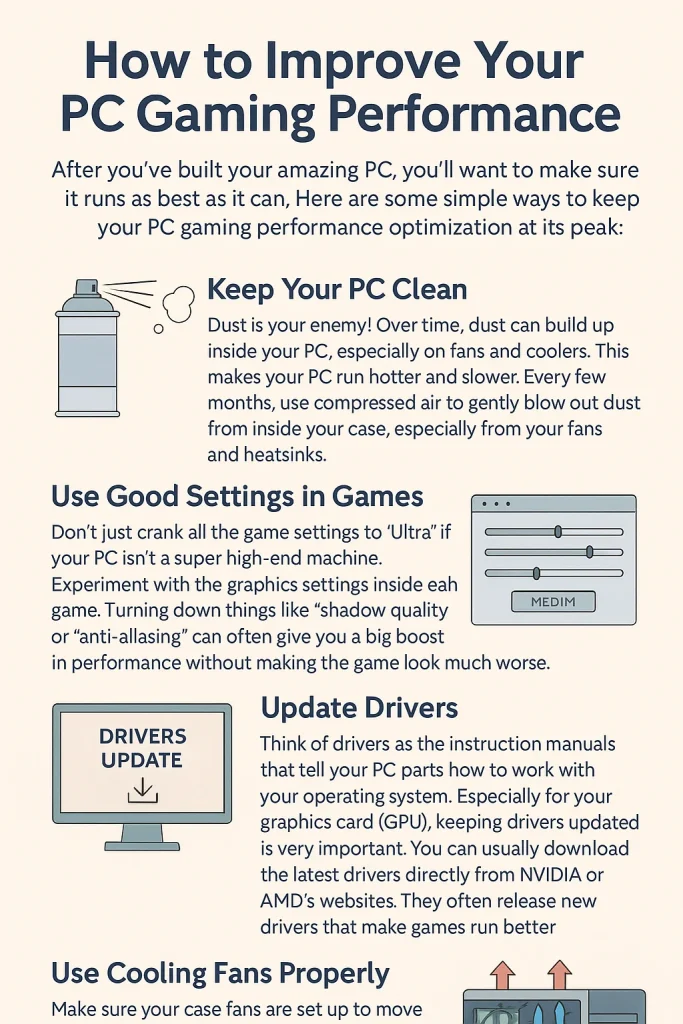
How to Improve Your PC Gaming Performance
After you’ve built your amazing PC, you’ll want to make sure it runs as best as it can. Here are some simple ways to keep your PC gaming performance optimization at its peak:
- Keep Your PC Clean: Dust is your enemy! Over time, dust can build up inside your PC, especially on fans and coolers. This makes your PC run hotter and slower. Every few months, use compressed air to gently blow out dust from inside your case, especially from your fans and heatsinks.
- Use Good Settings in Games: Don’t just crank all the game settings to “Ultra” if your PC isn’t a super high-end machine. Experiment with the graphics settings inside each game. Turning down things like “shadow quality” or “anti-aliasing” can often give you a big boost in performance without making the game look much worse.
- Update Drivers: Think of drivers as the instruction manuals that tell your PC parts how to work with your operating system. Especially for your graphics card (GPU), keeping drivers updated is very important. You can usually download the latest drivers directly from NVIDIA or AMD’s websites. They often release new drivers that make games run better.
- Use Cooling Fans Properly: Make sure your case fans are set up to move air efficiently. You generally want cool air coming in from the front or bottom and hot air being pushed out from the back or top. A good airflow helps keep all your components cool and running at their best.
Final Words
Building your own gaming PC might have seemed difficult at first, but now you know it’s possible, even for beginners. You don’t need to be a computer expert. With a little time, care, and the right steps, you can make a powerful gaming PC all by yourself.
You’ve learned what each part does, how to put everything together, and how to make your PC work better. It’s like building something special with your own hands. And the best part? You’ll soon be playing your favorite games on a PC you made.