
How to Clean a PC: A Step-by-Step Guide for Optimal Performance
Is your computer running slower than it used to? Do you hear the fans whirring louder than usual? Chances are, your PC is begging for a good cleaning. Just like any other machine, your personal computer accumulates dust, dirt, and grime over time, which can significantly hinder its performance and even shorten its lifespan.
Learning how to clean a PC is a fundamental skill for any computer owner, ensuring your system runs smoothly, quietly, and efficiently for years to come. This guide will walk you through the entire process, making it easy for even beginners to tackle this essential maintenance task.

Why Cleaning Your PC Matters
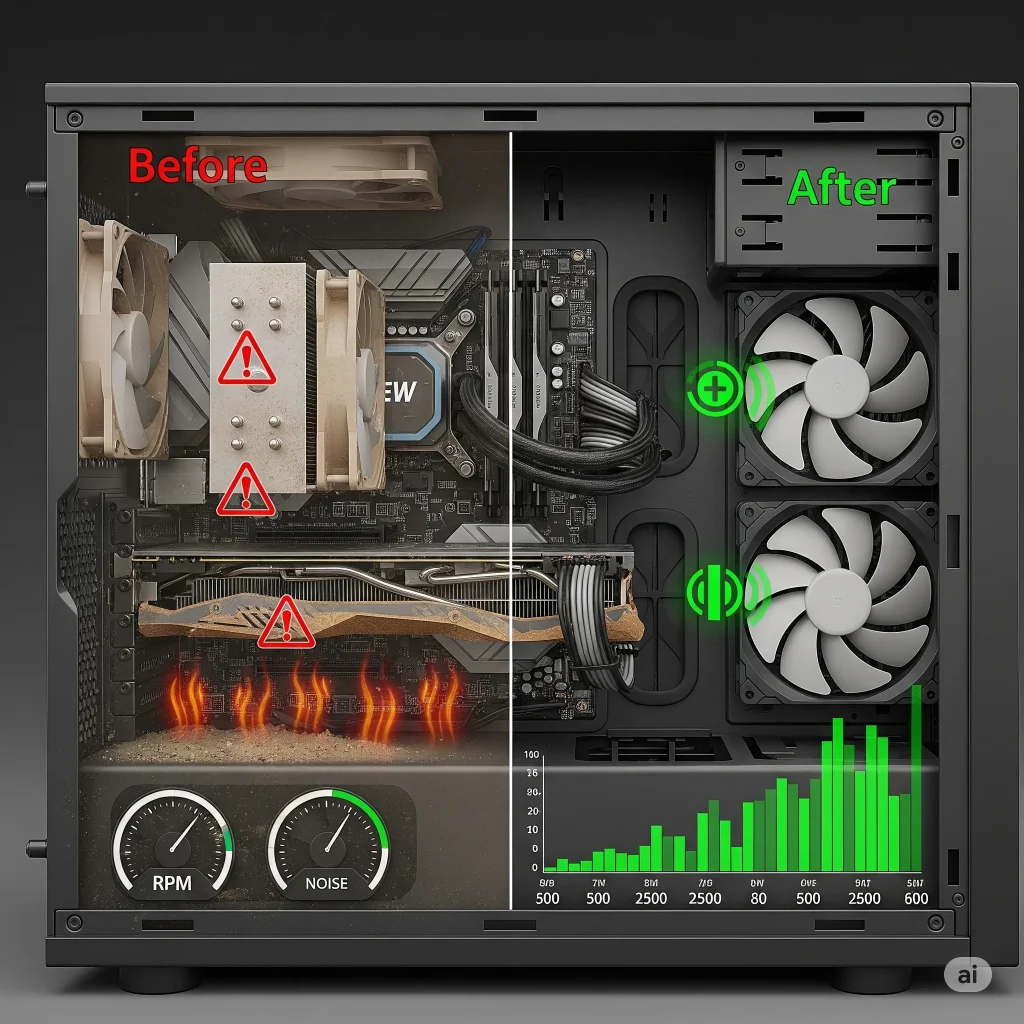
Think of your PC’s internal components as tiny, intricate highways. When dust and debris build up, these highways get congested. This leads to several problems:
- Overheating: Dust acts as an insulating blanket, trapping heat inside your PC. Overheating can cause your components to slow down (a process called “thermal throttling”) to prevent damage. In severe cases, it can lead to system crashes or even permanent hardware failure.
- Reduced Performance: When components like your CPU and GPU get too hot, they can’t perform at their best. This means slower processing speeds, choppy gameplay, and overall sluggishness.
- Increased Noise: Fans work harder to combat the heat, spinning faster and louder to try and dissipate it. A clean PC runs cooler and, therefore, quieter.
- Shorter Lifespan: Consistent overheating puts immense stress on your hardware, accelerating wear and tear. Regular cleaning helps prolong the life of your valuable components.
In short, a clean PC is a happy PC, delivering optimal performance and reliability.
What You’ll Need
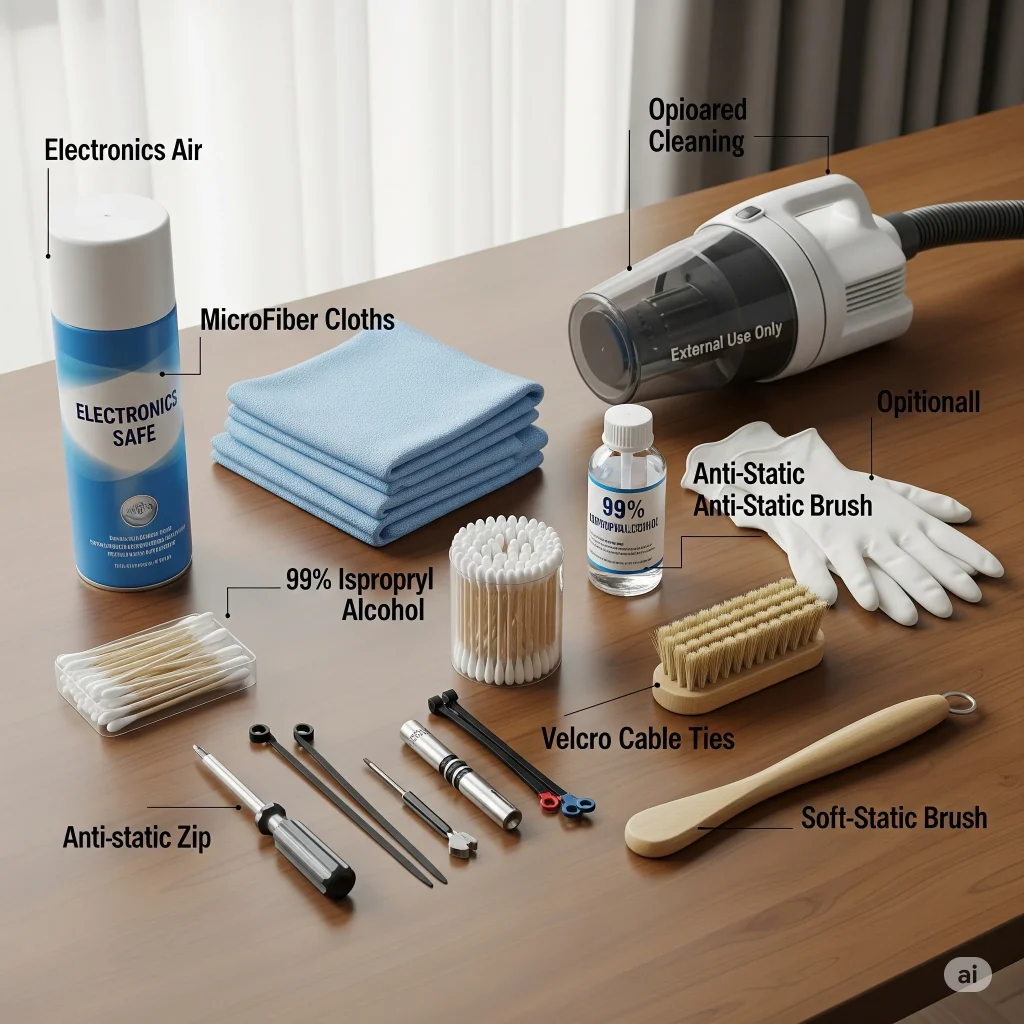
Before you begin, gather all the necessary tools. Having everything at hand will make the cleaning process much smoother and more efficient.
- Can of Compressed Air: Essential for blasting dust out of tight spaces. Make sure to buy one specifically for electronics, as some industrial versions can leave residue.
- Microfiber Cloths: Soft, lint-free cloths are perfect for wiping surfaces without scratching them. Have a few on hand.
- Isopropyl Alcohol (99% purity): Great for cleaning stubborn grime or residue on non-porous surfaces. Avoid using rubbing alcohol, which often contains water and impurities.
- Cotton Swabs or Q-tips: Useful for cleaning small, hard-to-reach areas.
- Screwdriver Set: You’ll likely need a Phillips-head screwdriver to open your PC case. A magnetic tip can be helpful for tiny screws.
- Zip Ties or Velcro Cable Ties: For improving cable management after cleaning.
- Small Brush (anti-static recommended): A soft-bristled brush (like a clean paintbrush) can help dislodge dust from fan blades or heat sinks.
- Vacuum Cleaner (with caution): While not for directly cleaning inside the PC, a vacuum can be used around the PC to suck up dislodged dust. Do NOT use it inside the case due to static electricity risks.
- Gloves (optional): To keep your hands clean.
Safety First: Crucial Precautions Before Cleaning
Safety is paramount when working with electronics. Ignoring these steps can lead to damage to your PC or even personal injury.
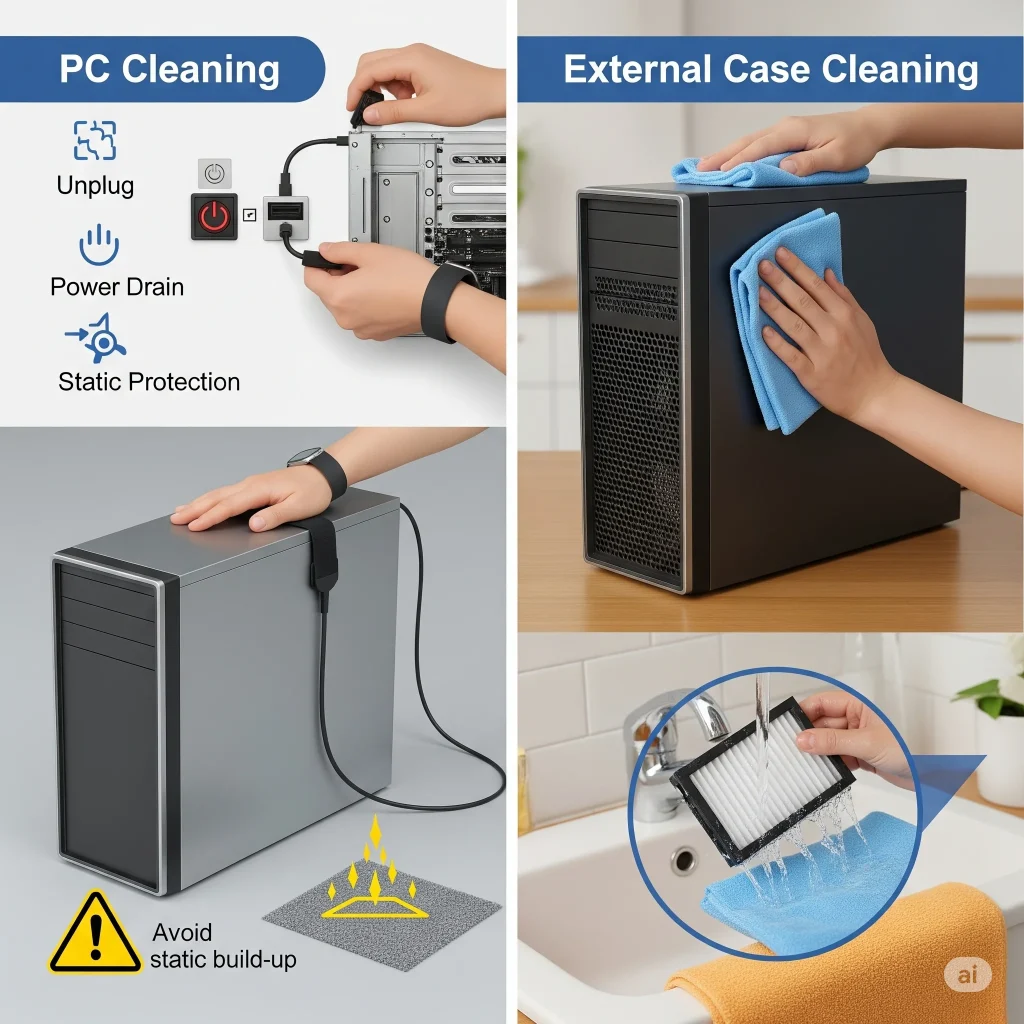
- Unplug Everything: This is the most critical step. Before touching anything inside your PC, disconnect the power cable from the wall outlet and from the back of your computer. Also, unplug all peripherals (monitor, keyboard, mouse, USB devices, etc.).
- Power Drain: After unplugging, press and hold the power button on your PC for 10-15 seconds. This helps drain any residual power stored in the capacitors, making it safer to work inside.
- Ground Yourself (Static Electricity): Static electricity is your PC’s worst enemy. A static discharge can permanently damage sensitive components.
- Anti-Static Wrist Strap: The safest method is to wear an anti-static wrist strap connected to an unpainted metal part of your PC case.
- Touch Grounded Metal: If you don’t have a strap, frequently touch an unpainted metal part of your PC case before and during the cleaning process. Avoid working on carpeted surfaces if possible.
- Work in a Well-Ventilated Area: Compressed air can kick up a lot of dust. Work in a garage, outside, or a room with good airflow to avoid inhaling the dust.
- No Liquids (Unless Specified): Never spray liquids directly onto internal components. Only use isopropyl alcohol sparingly on a cloth or cotton swab for specific surfaces.
Step-by-Step Cleaning Guide
Now that you’re prepared, let’s get into the nitty-gritty of cleaning your PC.
1. External Case Cleaning
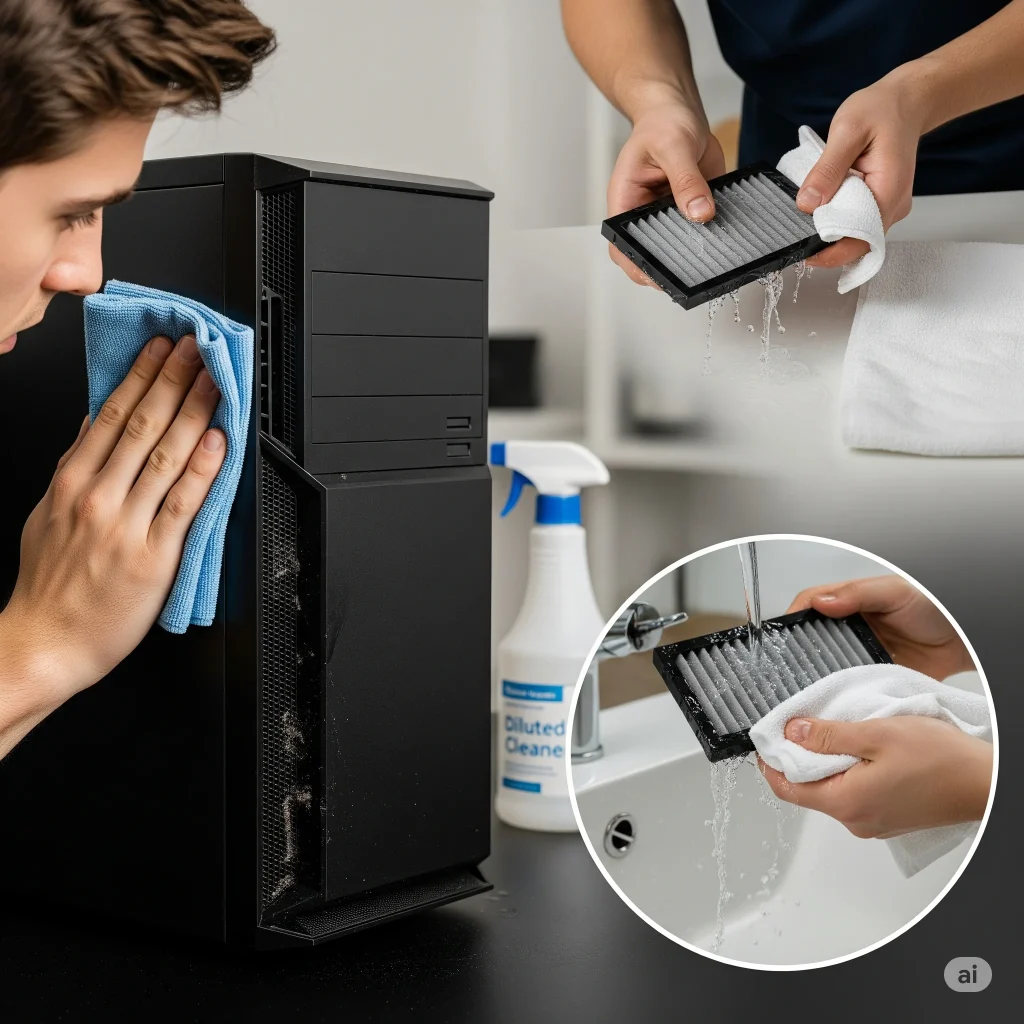
Start with the outside. This is the first line of defense against dust and grime getting inside.
- Wipe Down Surfaces: Use a slightly dampened microfiber cloth (dampened with water or a very diluted all-purpose cleaner, then thoroughly wrung out) to wipe down the exterior of your PC case. Pay attention to vents and air intakes where dust tends to accumulate.
- Clean Air Filters: Many modern PC cases have removable dust filters on the front, top, or bottom. Gently slide these out and clean them under running water (if washable) or by vacuuming/brushing off the dust. Ensure they are completely dry before putting them back.
2. Internal Dust Removal
This is where the magic happens and where you’ll make the biggest impact on performance.
- Open the PC Case: Locate the screws on the back of your PC case, usually holding the side panel in place. Unscrew them and gently slide or pivot the side panel off. If you have a tempered glass panel, be extra careful as it’s fragile.
- Initial Dust Blast (General Area): Take your can of compressed air. Use short, controlled bursts. Hold the can upright to prevent propellant from spraying out. Work from top to bottom and front to back, directing dust out of the open side of the case. Be thorough but gentle.
- Clean Case Fans: Your case fans are crucial for airflow.
- Hold the Blades: Before spraying, gently hold the fan blades in place to prevent them from spinning rapidly. This prevents damage to the fan motor.
- Blast Dust: Use compressed air to blast dust off the fan blades and motor housing.
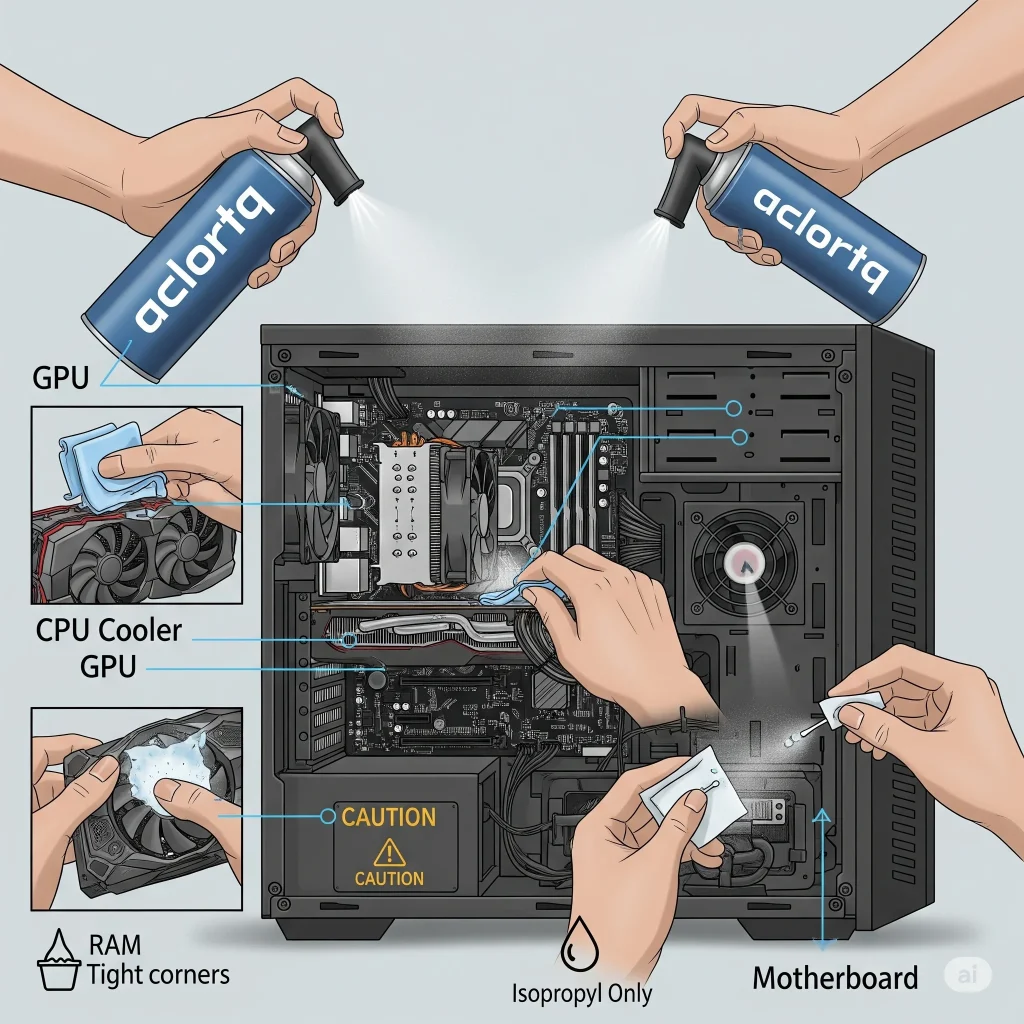
- Clean the GPU (Graphics Card): The graphics card often has its own set of fans and a large heatsink that can trap a lot of dust.
- Hold GPU Fans: Similar to case fans, hold the GPU fans still while spraying.
- Spray Heatsink: Direct compressed air into the fins of the GPU’s heatsink to dislodge trapped dust. You might need to spray from multiple angles.
- Clean the CPU Cooler: The CPU cooler (either a fan/heatsink combo or an AIO liquid cooler radiator) is a major dust magnet.
- Heatsink Fins: Use compressed air to blow dust out of the fins of the CPU heatsink. Again, spray from different angles to ensure all dust is cleared. If it’s a fan-based cooler, hold the fan blades.
- Radiator (for AIOs): For liquid coolers, blast compressed air through the radiator fins.
- Power Supply Unit (PSU): Your PSU often has a fan that draws air in.
- External Fan Port: If your PSU has a fan facing downwards or outwards on the case, use compressed air to blow dust out of its vents. Do not open the PSU, as it contains dangerous capacitors.
- Motherboard and Other Components:
- Gentle Blasts: Use short bursts of compressed air to gently clear dust from the motherboard surface, RAM sticks, and any other expansion cards.
- Cotton Swabs: For stubborn dust in tight crevices around ports or small chips, use a cotton swab lightly dampened with isopropyl alcohol (ensure it’s not dripping wet).
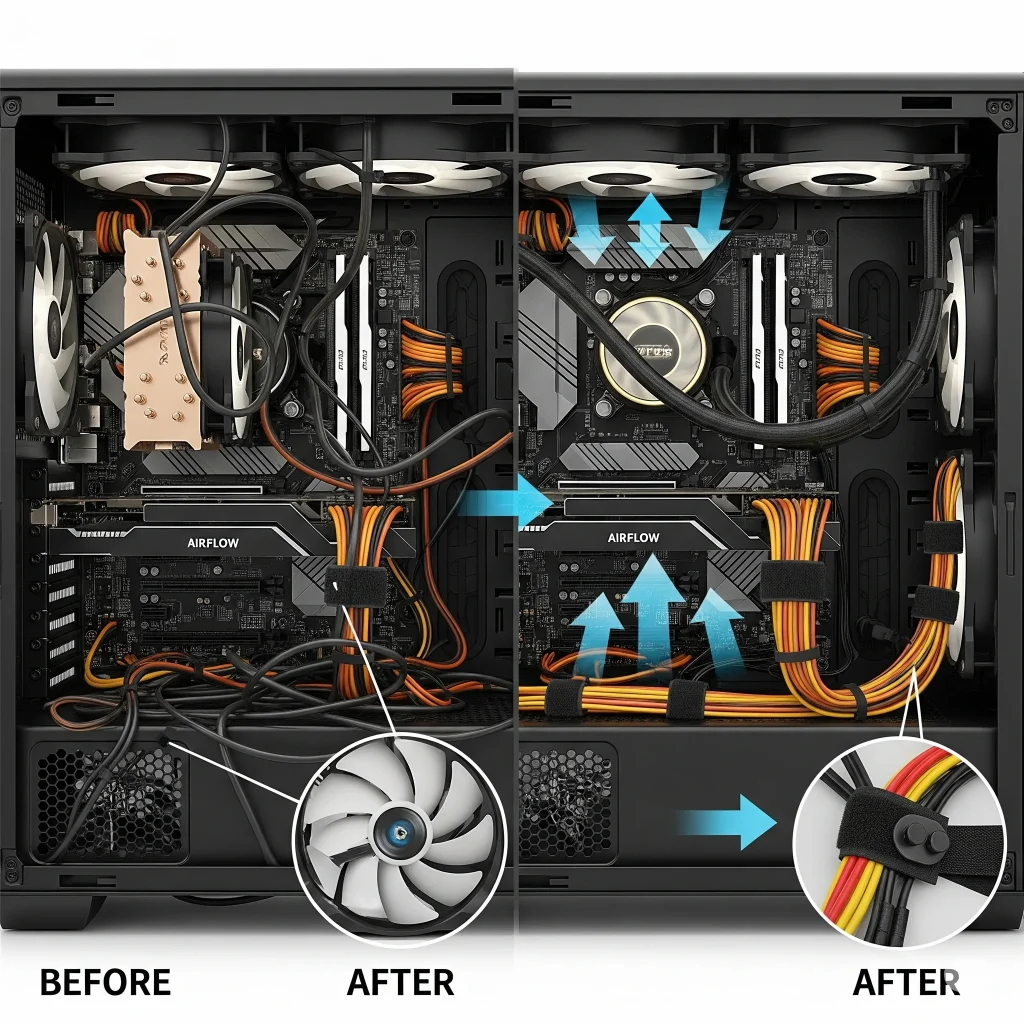
3. Cable Management
While not directly a “cleaning” step, good cable management significantly improves airflow and makes future cleaning much easier.
- Untangle and Reroute: Take some time to untangle any messy cables inside your PC.
- Use Ties: Use zip ties or Velcro cable ties to bundle cables together and route them neatly along the back of the motherboard tray or out of the direct path of airflow. Aim to keep cables away from fans and vents.
- Impact on Airflow: Neatly managed cables allow air to flow freely through your case, improving cooling efficiency.
4. Cleaning Peripherals
Don’t forget your input devices and monitor, which also gather dust and germs.
- Keyboard:
- Shake Out Debris: Turn your keyboard upside down and gently shake out any loose crumbs or debris.
- Compressed Air: Use compressed air to blast dust and particles from between the keys.
- Wipe Keys: Dampen a microfiber cloth with isopropyl alcohol and wipe down the keycaps and surrounding surfaces. For really sticky grime, use a cotton swab.
- Mouse:
- Wipe Down: Use a microfiber cloth dampened with isopropyl alcohol to clean the top, sides, and underside of your mouse.
- Sensor: Gently wipe the optical sensor on the bottom of the mouse with a cotton swab lightly dampened with isopropyl alcohol.
- Monitor:
- Power Off: Always turn off your monitor before cleaning.
- Specialized Cleaner: Use a monitor-specific cleaning solution (often comes with a microfiber cloth) or just a clean, dry microfiber cloth.
- Gentle Wipes: Gently wipe the screen in one direction (e.g., from top to bottom) to avoid streaks. Never use harsh chemicals or paper towels, which can scratch the screen.
- Frame: Wipe the monitor’s frame with a general-purpose cleaner on a cloth.

How Often Should You Clean Your PC?
The frequency of cleaning depends on several factors:
- Environment: If your PC is in a dusty environment (e.g., near an open window, with pets, in a workshop), you’ll need to clean it more often.
- Usage: A PC used heavily for gaming or resource-intensive tasks will generate more heat and thus attract more dust.
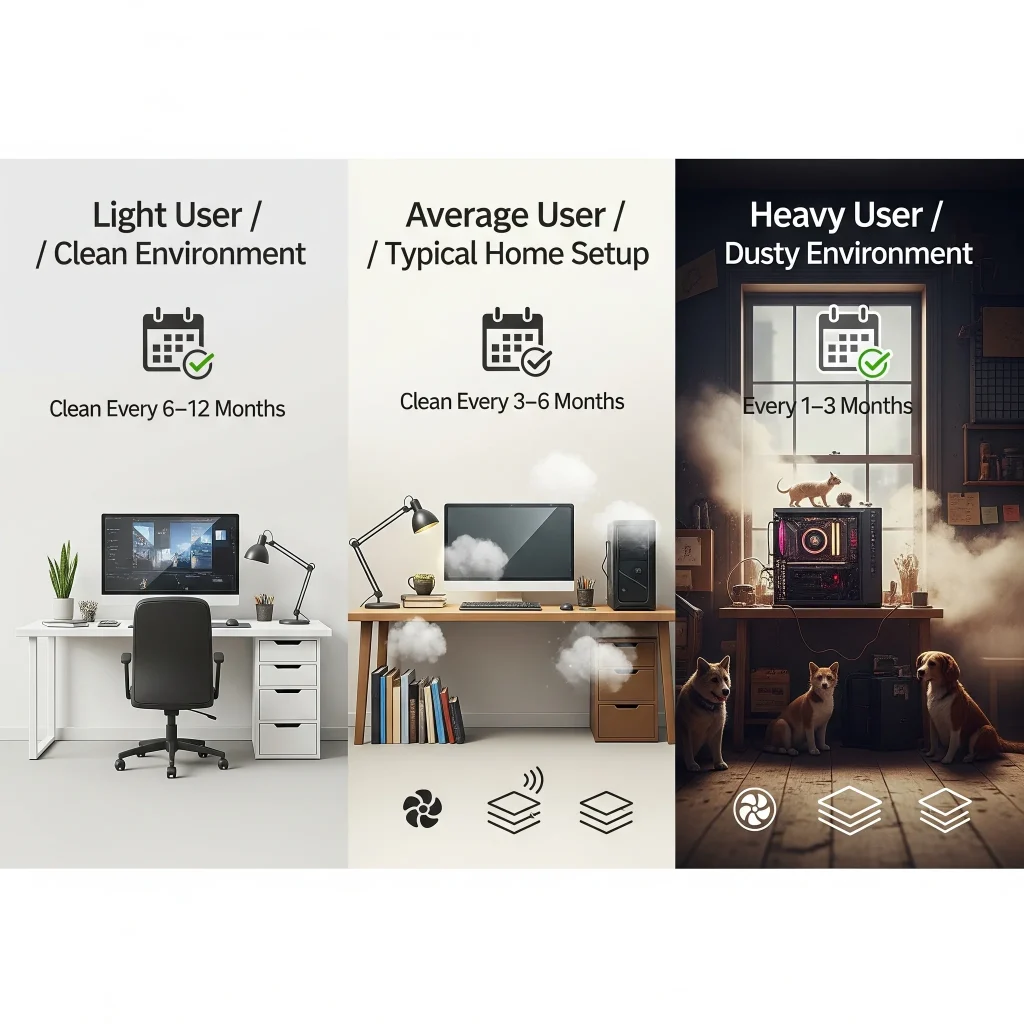
- Personal Preference:
- Light Users/Clean Environment: Every 6-12 months.
- Average Users/Typical Environment: Every 3-6 months.
- Heavy Users/Dusty Environment: Every 1-3 months.
A good rule of thumb is to check your PC’s internal cleanliness every few months. If you see a visible layer of dust on components or if you notice an increase in fan noise, it’s time for a cleaning.
Tips to Keep Your PC Clean Longer
Preventative measures can reduce the need for frequent deep cleaning.
- Elevate Your PC: Don’t place your PC directly on a carpeted floor. Carpets are major dust generators. Use a desk or a hard floor, or even a small stand to elevate it.
- Regular External Wipes: Give the outside of your PC a quick wipe down with a microfiber cloth every week or two.
- Clean Room: Keep the room where your PC is located as clean as possible. Regular vacuuming and dusting of the room itself will reduce airborne particles.
- Manage Cables: As discussed, good cable management improves airflow and prevents dust traps.
- Pet Hair Management: If you have pets, be extra vigilant. Pet hair is a significant contributor to PC dust buildup. Consider more frequent cleaning if you have furry friends.
- Good Airflow in Case: Ensure your PC case has good airflow, with intake fans bringing in cool air and exhaust fans pushing hot air out.

FAQs About PC Cleaning
Here are answers to some common questions beginners have about cleaning their PCs.
Conclusion
Cleaning your PC might seem daunting at first, especially when you’re dealing with delicate internal components. However, by following this step-by-step guide and prioritizing safety, you’ll find that it’s a straightforward and incredibly rewarding maintenance task.
A clean PC isn’t just about aesthetics; it’s about safeguarding your investment, preventing costly hardware failures, and ensuring you get the best possible performance and longevity from your system. So, grab your tools, unplug your machine, and give your PC the care it deserves. Your faster, quieter, and more reliable computer will thank you for it!